Walls and a window

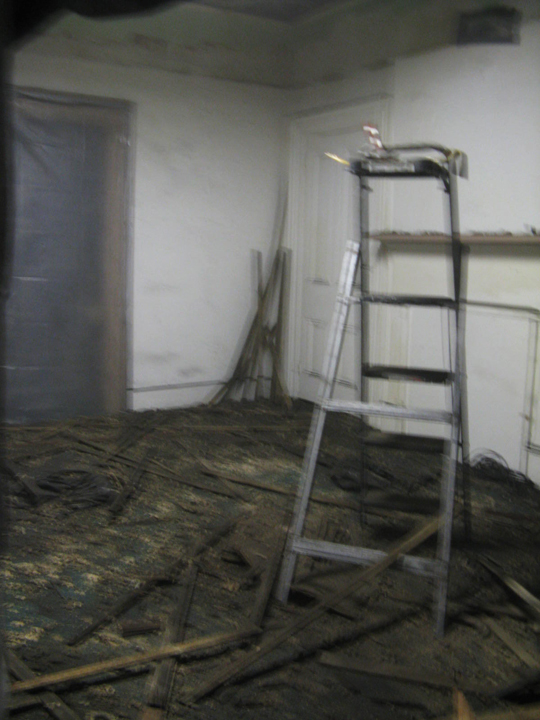
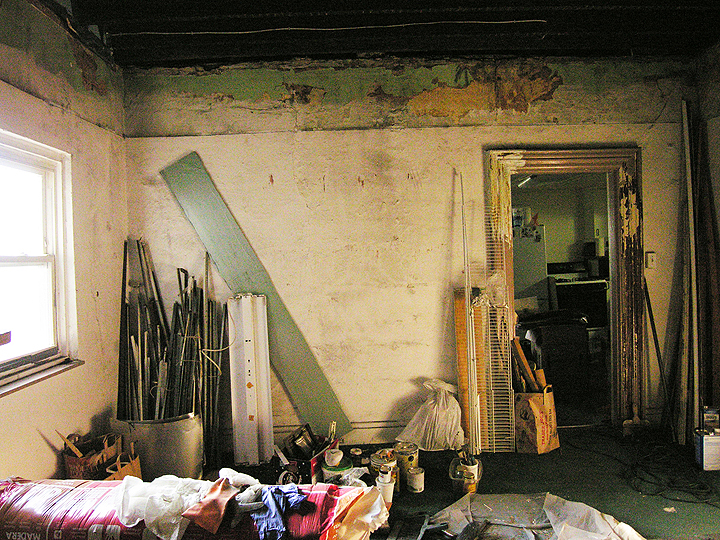
Where were we?  Oh, yes.  In the middle room on the first floor, with no ceiling.
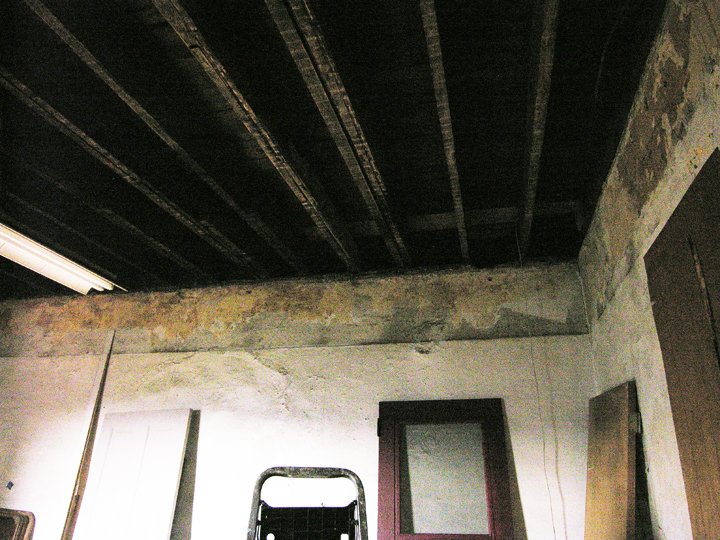
I wasn’t yet up for the challenge of putting up a ceiling and turned my attention to the walls, which were lumpy and had that swirly texture you see a lot in rentals.  That stucco look was modern and hip once, but it survives because it’s a quick and easy way to disguise imperfect walls.

Textured walls catch dust, though, and even with bright white paint they never look really clean.  I was prepared to skim coat the room to level out the surface, but  that would take a long time and the walls were already thick with repeated patching and layers.
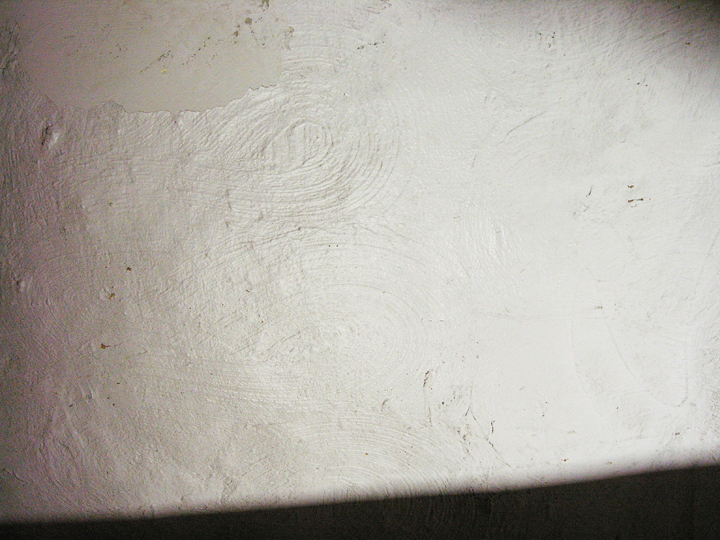
I really didn’t want to add more stuff on top of this.  I was scraping at it dispiritedly one day and discovered that the textured surface beneath the paint was joint compound, applied in big looping motions and covered with countless coats of cold white semi-gloss latex.  This was encouraging, because joint compound is water soluble.  I’d been reading about how to remove a popcorn textured ceiling by soaking the material until it was soft enough to scrape off.  I experimented with that technique on these walls and discovered that if I made lots of shallow scratches, just enough to pierce the paint layer, then sponged water into the scratched areas, the joint compound underneath would soften.  When it got damp enough, the thick latex paint could be peeled off in wide ragged strips.

When most of the paint had been peeled away, the joint compound could be soaked  further, to the point where it could be (gently) scraped off with a palette knife or scraper.  At that point it wasn’t hard to get down to the original horsehair plaster (although around here, apparently, they often used pig’s hair).  Old plaster is water-resistant and can take it a lot of wetting, but it took a bit of practice to find the right angle and pressure to avoid gouging the surface.  I keep reminding myself, it takes less time to be careful than it does to repair what you’ve damaged.  One day I’ll absorb this lesson.

After a careful scraping, the remaining traces of joint compound could be washed off with a scrub brush, then the wall could be wiped clean with a damp sponge.  It worked best to do this in sections of about 3-4 feet square — an area that was easy to reach and to keep damp.  Plastic on the floor was essential; this is a soggy process.

Speaking of water damage, there was the window.
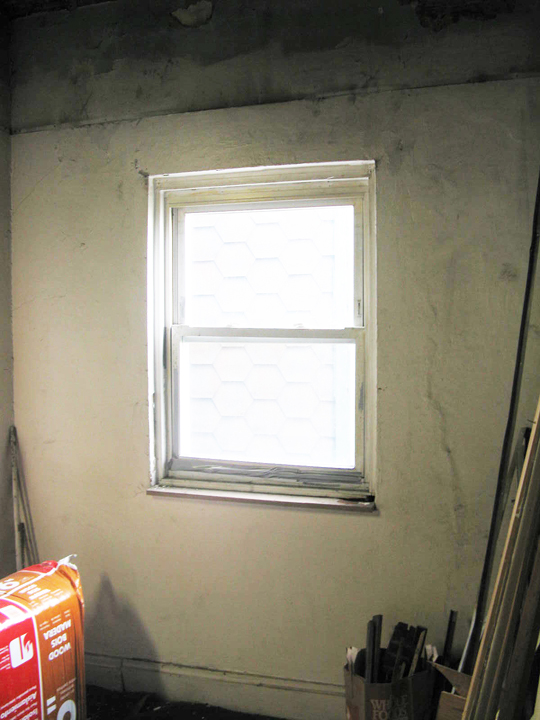
The original windows for the house were long gone.  Judging from the style of some old sashes in an enclosed basement space, their replacements were gone too.  Apart from the basement, all the windows were white vinyl, and every one had issues.  One day they’ll all be replaced, but the window in this room — and the wall below it — was in particularly bad shape.
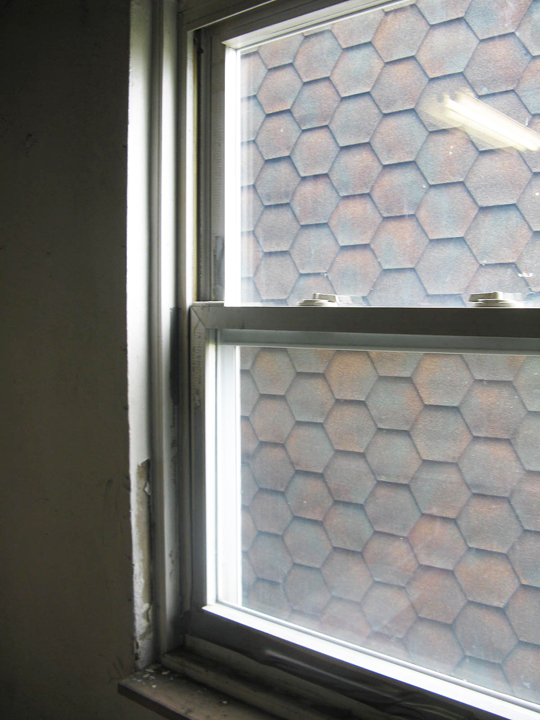
(That interesting texture outside the window is the Insulbrick siding on my neighbor’s house.  That hexagon is my favorite type of Insubrick because when it’s old it gets these beautiful variegated tones.  This siding was probably green when it was new;  now each hexagon is different, with rusty color coming through, like scales on a sea creature.)

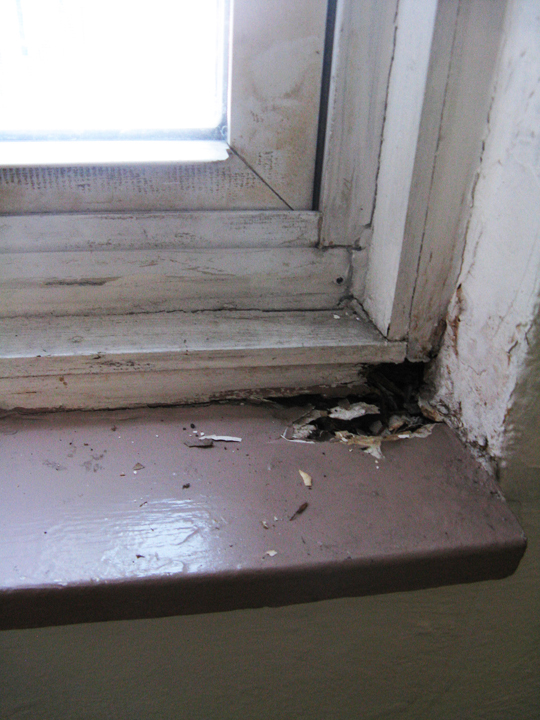
This window is on the west side of the house and gets the brunt of the weather.  The lower sash didn’t close all the way and the casing and sill were rotten, with a gap to the outdoors where air was coming in.
Outside looked even worse.
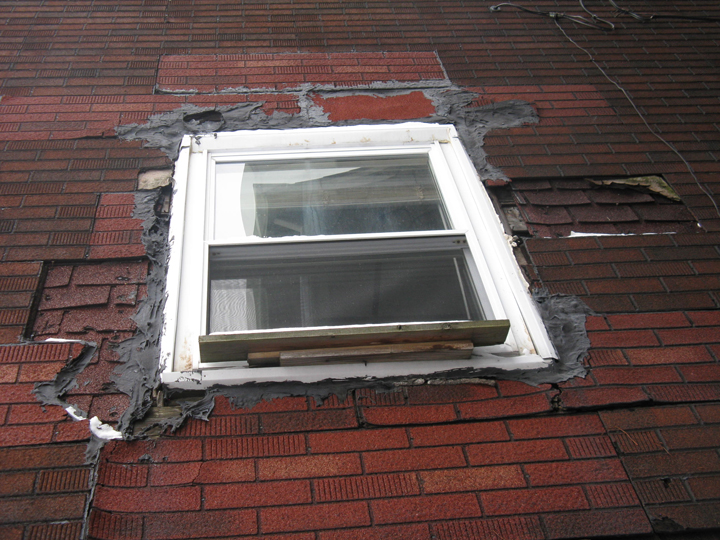
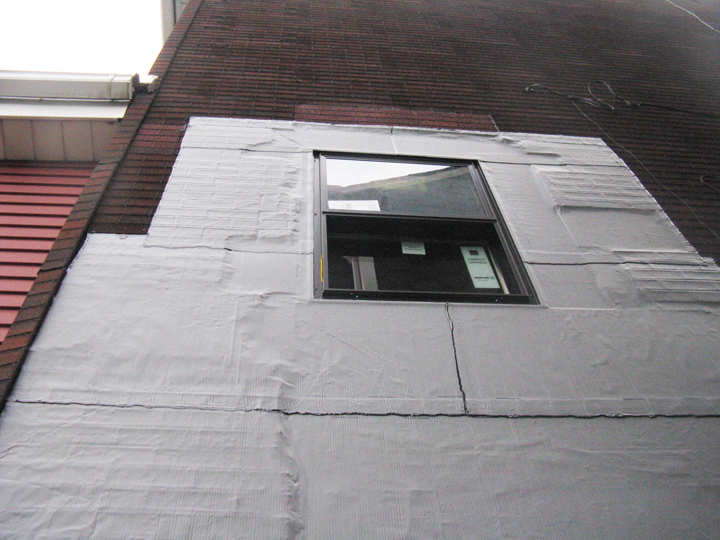
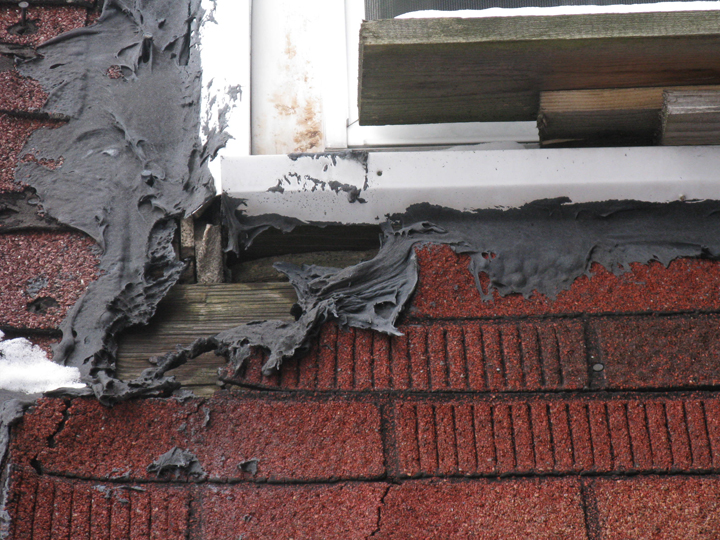
That is a layer of red-brick patterned Insulbrick over older dark red asphalt shingles, liberally frosted with roofing putty.  I like how this angle looks like a crazy floor you could walk on.
Because water had been getting into the wall for who knows how long, the area under the window would have to be re-framed.  This was outside my experience and I got Russ and Joe, father and son neighborhood contractors, to come in.

I saved a bit by doing the interior demo myself — pulling off the window trim, opening up the wall and removing the the plaster and lath, pulling nails and cleaning up.
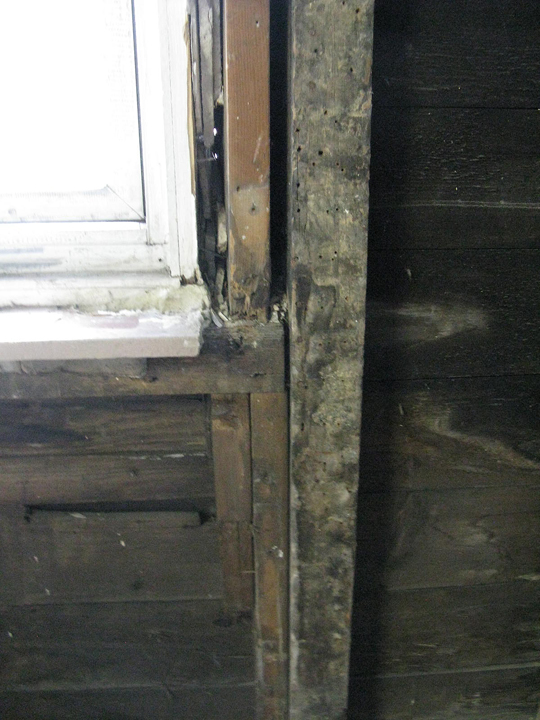
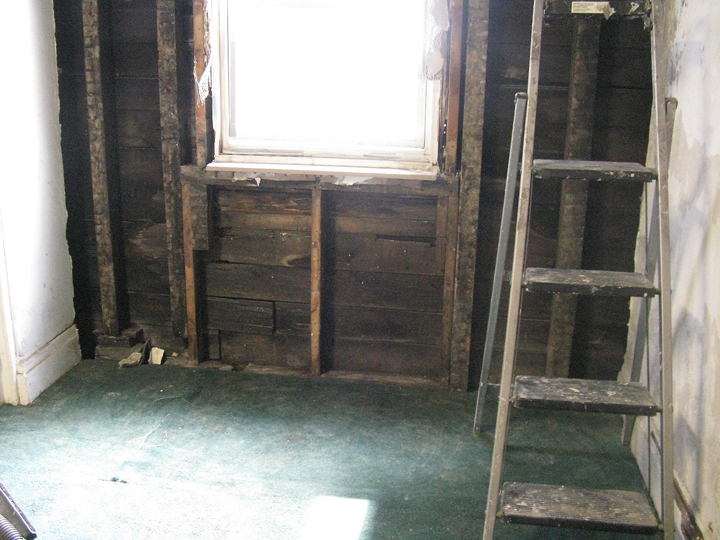
Once the plaster and the lath strips were off you could tell that there had been a fire at one point — some of the studs were charred.  Later, we pulled up the carpet and underlayment and discovered that right-hand corner of the old floor was charred, too.

Russ and Joe reframed  that bit of wall and installed the new window …
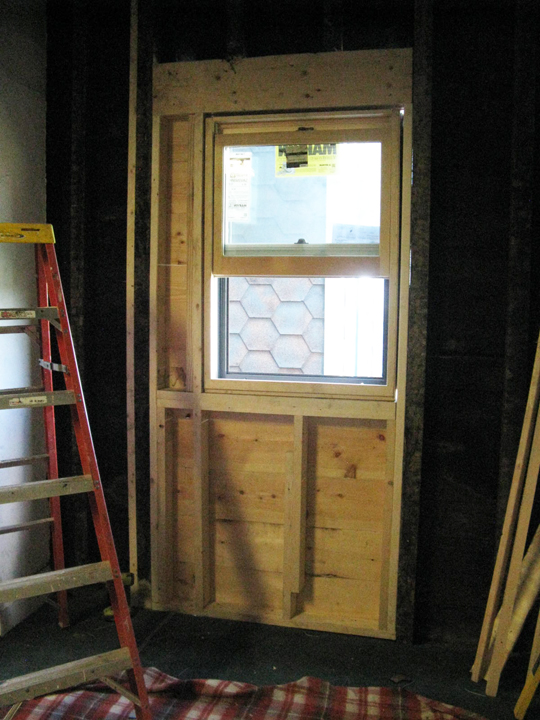
… then wrapped it well on the outside.
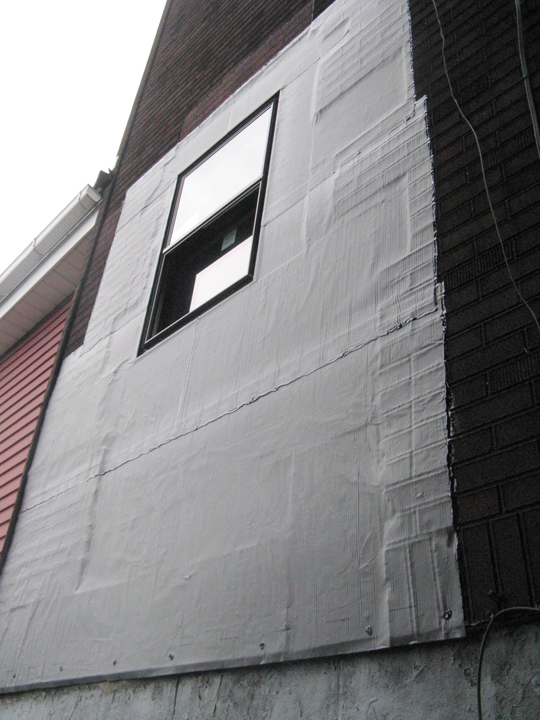
It doesn’t look like much but it is such a relief to know that the wall is closed up tight.  This side of the house isn’t visible from the street, so it’s fine until we can get to the exterior renovation.

Next steps in this room: add electric, insulate, close up the wall and put in a ceiling.
First floor middle room

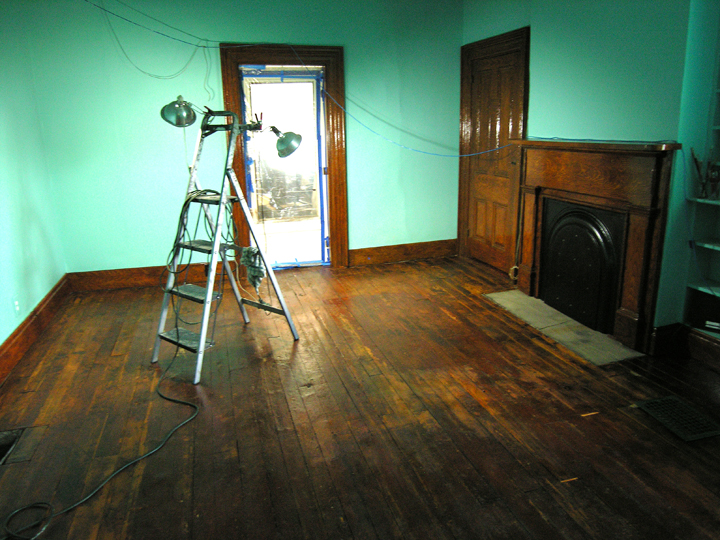
This room was just finished last month.  Mostly finished.  There are a few more things to do, but my partner waited a long time for this — it’ll be his media room and library — and has already moved in.  Now it’s full of stuff; furniture, boxes, stacks of books everywhere.  He’s alphabetizing by author and doing stuff with cords and cables.  Eventually there will be a rug, or rugs.  It’ll be a while before it’s ready for another public viewing — or shoe moldings.

Until that day comes, this is the “after” photo.  This was taken after the first coat of shellac on the floor and was my first look at the final effect of all the elements together.  My initial thought was “wow, that is a lot of shiny brown stuff for one room”.  The amber shellac darkened the floor even more than we expected.  We knew it would get darker, but seeing it suddenly pop into view was another matter.  It took some adjusting.

Here’s what we started with (these next two are the realtor’s photos).  This would have been the dining room when the house was built. The front room, a parlor, is through the doorway ahead.  The kitchen and the back of the house are behind you.  On the left wall you can sort of see the lumpy seam where there was once a door to the hallway, closed up when the house was converted to apartments in the 1890s.

Simple and functional.  I’ve lived in a few places that looked pretty much like this (minus the couch and the snake).

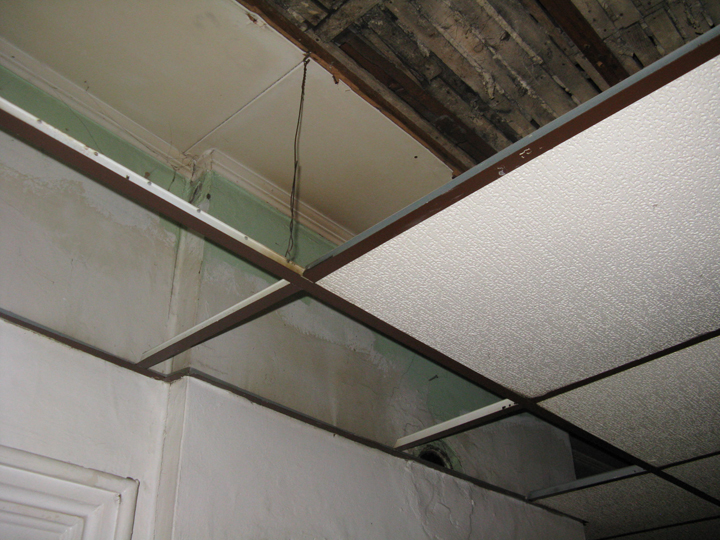
The room didn’t look that good again for six years, because the first thing we did in here was take down the drop ceiling.  Most of the plaster was gone, leaving the wood lath strips and crumbly plaster dangles.  Around the perimeter was a border of acoustic tile ceiling, with a bits of the original plaster under that.

I get why people installed these ceilings, it was so much easier than fixing a ceiling and probably made the space warmer, but they make rooms feel awful.  Now that you can see how high the ceiling was supposed to be the room looks horribly cramped under that grid.

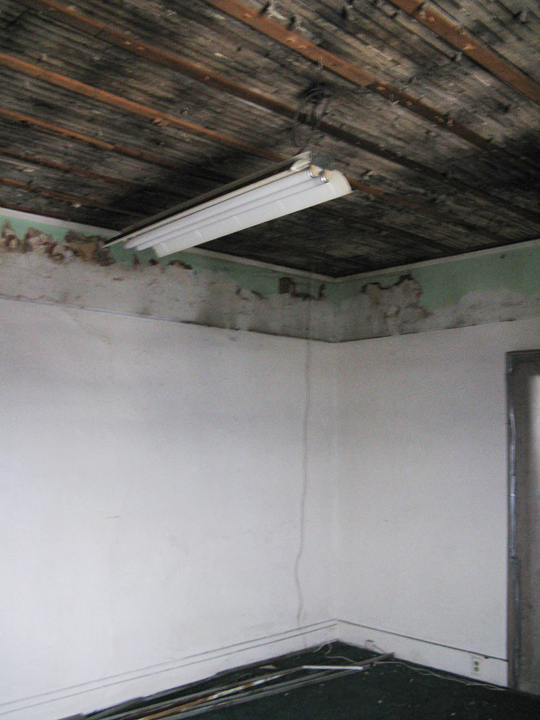
This isn’t great, either.

My usual inclination is to leave original material in place, but not here.  On the upper face of the of the wooden lath strips was a quarter inch of black dust.  Just touching them brought down clouds of fine  powder.  Even if the lath had been clean, putting drywall on top of such an uneven surface would be fussy and tedious.  Removing the lath would allow us to put in sound insulation (my guy likes his movies at movie theater volume).  We could also get electrical work done for this room and the one above it.  It made sense to just to remove all the material down to the joists.  My partner volunteered for this job.

These are a bit out of focus, but it really was cloudy and nasty in there.

It looks very dramatic and awful but demo is actually fun.

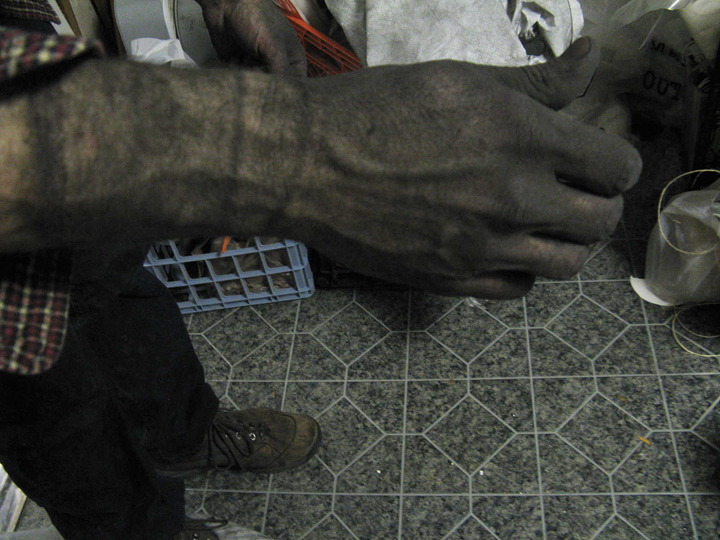
This is why so many houses around here have a shower in the basement.  This was a working class neighborhood; many of the people worked in the mills or on the railroads nearby.  A lot of people came home from work this dirty, every day.  They would come in though the basement and get cleaned up before coming upstairs for dinner (and often a shot of whisky, so I’m told).  Pittsburgh was this dirty, buildings were covered in soot and pollution.

Here’s something not so positive about Pittsburgh:  the air quality here still isn’t the best.  Like any thriving city there are a lot of cars  and some polluting industry.  They’re working on it.  It’s a lot better than it used to be.

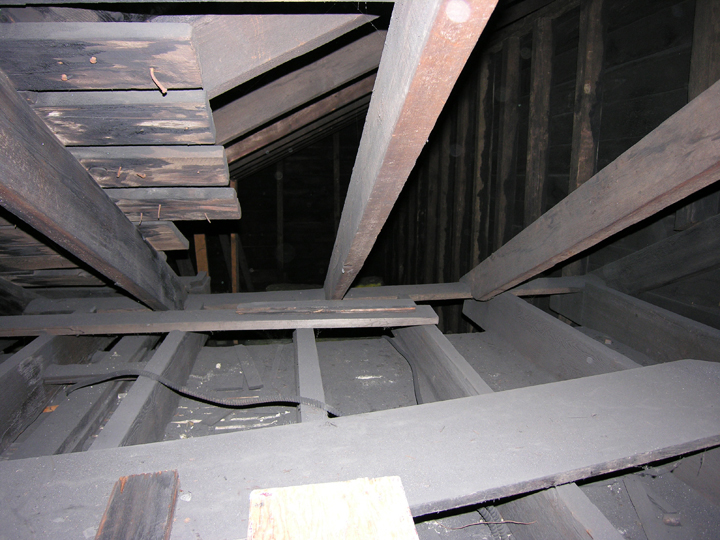
Inevitably, the pollution also found its way into buildings.  In areas that remain undisturbed by rain or or renovations, it’s still there.   In my attic crawlspace — facing  the valley where the railroad is and the mills used to be — there are small drifts of it.  See that soft gray stuff between the joists, that same color, dusting everything?  It’s faintly sparkly, a little bit greasy and so fine that it gets into your pores — it takes a couple of showers to get it out.

It’s quiet and still in there, which is good — under the right conditions, airborne coal dust is explosive.  The dust in my attic is probably a mixture of coal dust, other pollutants and stuff that’s already been burned, in which case it’s just a slightly less scary problem.

Aside from fire concerns, coal dust at any level is a health hazard.   Driving south from Pittsburgh and through West Virginia you see the law firm billboards advertising for mesothelioma patients.  We weren’t going to get black lung disease from renovating the house, but  according to the World Health Organization there is no safe level of coal dust exposure.

Getting every bit of the dust (The Dust) out would be impossible without entirely gutting the house, and I’m not doing that.  Instead, we follow the protocols: wear protective clothing, gloves and a respirator.  We collect the dust carefully, get it into bags which are carefully sealed and put into other bags which are also sealed, and get it out of the house.  Then I vacuum a lot with a HEPA filter and if it’s a washable surface like paint or plaster, wash with TSP substitute.  And then I wash it a couple times more with water.

That’s what we did in this room.  After all the unwanted material had been cleared away, we vacuumed the joists and the underside of the second floor, then scrubbed the joists.  Some time later I patched the holes in the ceiling, aka the underside of the second floor.  When upstairs you could see into this room, which we got used to pretty quickly but seemed to unnerve our guests.

And … then we left it like this for a good long time.  There was so much other stuff to do, and the idea of putting in a ceiling was too overwhelming.

Next: walls, a window and a ceiling.

How restoring a fireplace turns into a decision about the water heater

Houses are interconnected systems sharing space, old houses ever so much more so.  Years of handyman fixes and improvised retrofits make straightforward projects unexpectedly complicated.

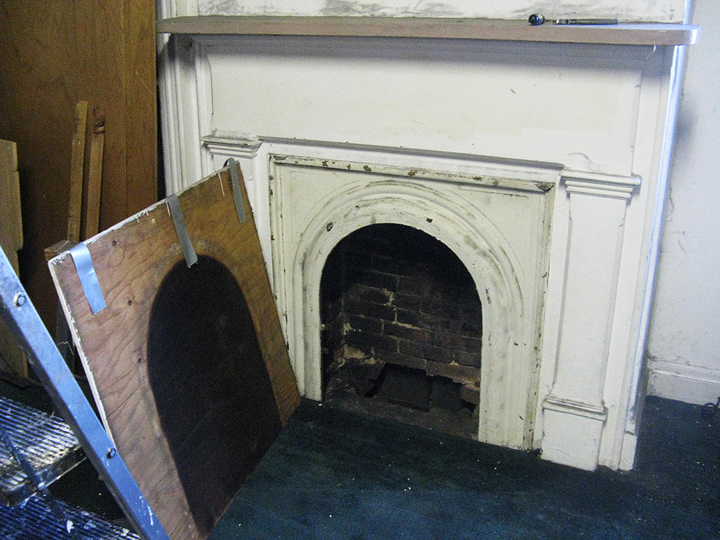
We weren’t going to use the fireplace in the downstairs middle room; the plan was to clean it out, strip the arched iron surround, make a piece to fill in the middle to close off the firebox and make the woodwork nice.

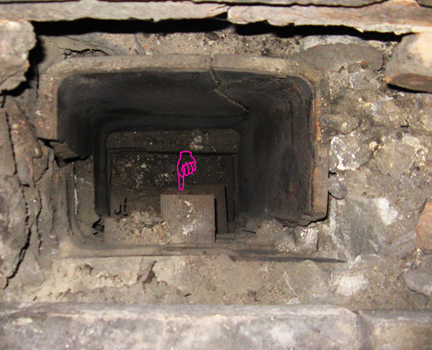
The bottom of the firebox was mostly gone and I realized that the open end of a pipe in the space below was the water heater vent.  It’s so dusty it looks like a brick here, but that pink pointer indicated the wide open end of old aluminum tubing.

This is not cool — it’s supposed to be vented up to the roof.  The amount of carbon dioxide that water heaters produce is very small and the vented air is warm so it’ll rise, but … no.  The fireplace couldn’t be closed up until this had been dealt with.

To vent this properly, there were a few options.  One  was to put a liner down the chimney, which would require the plumber getting on the roof, removing the chimney cap and threading a flexible pipe down three stories.  I’d rather not do this.  The cap is big and heavy and since we get hit by the wind up here, I had the contractor to attach it really, really well.

If we didn’t want to deal with the chimney, we could replace the water heater with a power vent water heater that could be vented through the basement wall — or with an electric unit that wouldn’t need venting at all.

The current water heater works okay but it’s over ten years old and would need to replaced in the next few years.  Between this and the cost of dealing with the chimney cap and lining the chimney, it started to make more sense to replace the water heater now and maybe upgrade a bit (the current water heater is 30 gallons — apartment sized).  We did some research and decided to get a hybrid electric water heater.  It’s a more-expensive option;  a regular electric water heater could be had for about $400.  But here’s our reasoning:  hybrids last a lot longer than conventional water heaters and they’re 2-3 times more energy efficient, so you’re supposed to make back the extra cost in a few years.  We’ll see (if I remember to pull out the bills and check then).

We bought a water heater from [big box store] and had it delivered and there it sat for a few weeks, because we had other stuff to do.  When I started calling around to find someone to install it, I discovered that this was all highly irregular.  “You already HAVE the water heater?  Hmm, let me ask someone and call you back” — then wouldn’t.  Nowhere in our research had there been any indication that homeowners didn’t select and purchase their water heaters.  Are you supposed to call the plumber, who orders the water heater and they arrive together — like getting a furnace?  What if you want a different kind than the plumber prefers to install?

Finally I found a company that was willing to take a chance on us.  They sent someone out and he confirmed that the circumstances and particulars were okay, i.e. the size of the room, since these water heaters don’t work in a small space.  A week or so later the fancy new water heater was installed and I joyfully closed up the fireplace.

What I’m working on now: restoring graining

Fixing up an old house is a lot about subtracting stuff.  Even if you aren’t gutting it, there are layers upon layers to remove before you can start fixing it up.

The middle room on the first floor would have originally been the dining room. It was also in the worst shape of any room in the house, and I’ve been working on it between other projects for a few years now.  This is also where I fell down the deepest rabbit hole yet.

The initial plan was to roughly strip the excess paint off the woodwork and repaint it.  In many areas the thick layers of latex had separated from the older paint underneath.  It was easy to remove large pieces by sliding a palette knife between the separated layers.  Underneath, I discovered the original graining.

Graining was a decorative painting technique used in the 19th century to make cheap woods like pine look more like mahogany, which was fancy and expensive.  The graining here didn’t really represent the highest level of craft — it didn’t really make the woodwork look like mahogany — but it was interesting and I decided to try to restore it.  This meant first getting off as much of the later paint as possible.

There were sections where  removing the paint layers wasn’t so easy.  Under thick layers of cold white gloss latex there was a thin layer of warm white paint.  It could be chipped off, but that took a heinous amount of time and removed the top layer of the painted patterning.  The white paint was also likely The Paint That Shall Not be Named*, to be treated with caution.

I compromised by taking the time to chip away the old white in areas where the graining was especially nice, like the mantel header.   (I wore  a respirator, and vacuumed frequently, natch).  But in places like doorway moldings, the graining was perfunctory, little more than sponge daubing.  There, the old paint was tenacious and couldn’t be removed without damaging the wood.

Rather than keep damaging the trim I was trying to restore, I covered those areas with a transparent brown ground coat,  then a layer of shellac, then reproduced the wood graining details with thinned oil paint.  The layering is what gives graining its depth.  There will be areas where the old graining segues to something more impressionistic, but that’s okay.

Removing paint down to a particular layer takes a while and is maddeningly boring if done for too long at a time.  So the graining restoration project has been underway more than a year.  I’ve been going in there and chipping (sorry) away at it, sometimes for ten minutes, sometimes for hours.

Now it’s almost all exposed and prepped for the final coats.

*lead