Houses are interconnected systems sharing space, old houses ever so much more so. Years of handyman fixes and improvised retrofits make straightforward projects unexpectedly complicated.
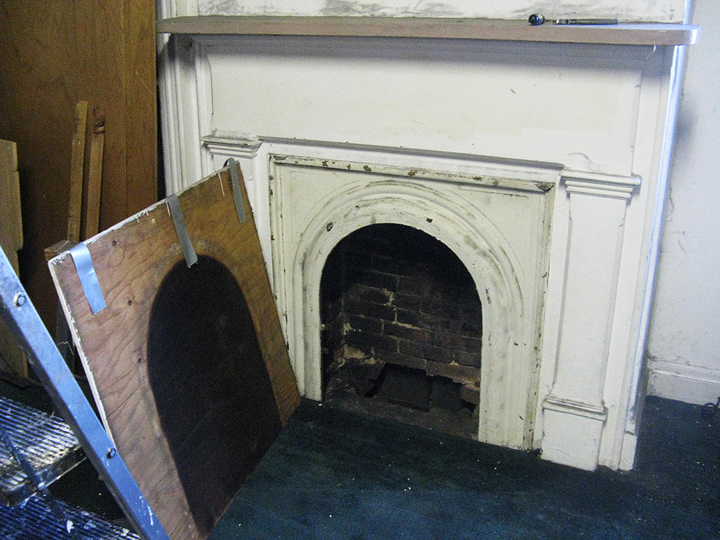
We weren’t going to use the fireplace in the downstairs middle room; the plan was to clean it out, strip the arched iron surround, make a piece to fill in the middle to close off the firebox and make the woodwork nice.

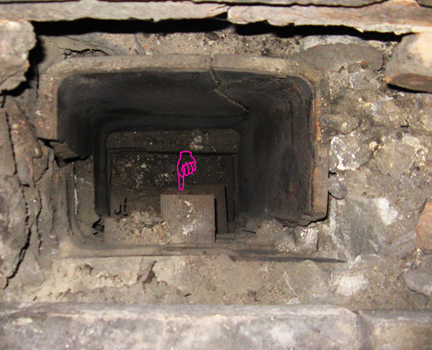
The bottom of the firebox was mostly gone and I realized that the open end of a pipe in the space below was the water heater vent. It’s so dusty it looks like a brick here, but that pink pointer indicated the wide open end of old aluminum tubing.

This is not cool — it’s supposed to be vented up to the roof. The amount of carbon dioxide that water heaters produce is very small and the vented air is warm so it’ll rise, but … no. The fireplace couldn’t be closed up until this had been dealt with.
To vent this properly, there were a few options. One was to put a liner down the chimney, which would require the plumber getting on the roof, removing the chimney cap and threading a flexible pipe down three stories. I’d rather not do this. The cap is big and heavy and since we get hit by the wind up here, I had the contractor to attach it really, really well.

If we didn’t want to deal with the chimney, we could replace the water heater with a power vent water heater that could be vented through the basement wall — or with an electric unit that wouldn’t need venting at all.
The current water heater works okay but it’s over ten years old and would need to replaced in the next few years. Between this and the cost of dealing with the chimney cap and lining the chimney, it started to make more sense to replace the water heater now and maybe upgrade a bit (the current water heater is 30 gallons — apartment sized). We did some research and decided to get a hybrid electric water heater. It’s a more-expensive option; a regular electric water heater could be had for about $400. But here’s our reasoning: hybrids last a lot longer than conventional water heaters and they’re 2-3 times more energy efficient, so you’re supposed to make back the extra cost in a few years. We’ll see (if I remember to pull out the bills and check then).
We bought a water heater from [big box store] and had it delivered and there it sat for a few weeks, because we had other stuff to do. When I started calling around to find someone to install it, I discovered that this was all highly irregular. “You already HAVE the water heater? Hmm, let me ask someone and call you back” — then wouldn’t. Nowhere in our research had there been any indication that homeowners didn’t select and purchase their water heaters. Are you supposed to call the plumber, who orders the water heater and they arrive together — like getting a furnace? What if you want a different kind than the plumber prefers to install?
Finally I found a company that was willing to take a chance on us. They sent someone out and he confirmed that the circumstances and particulars were okay, i.e. the size of the room, since these water heaters don’t work in a small space. A week or so later the fancy new water heater was installed and I joyfully closed up the fireplace.


